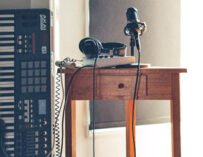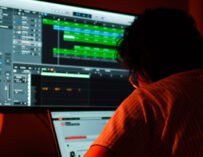
A studio’s design and layout is fundamental in complimenting the sound any pair of monitors can reproduce. Photo: Oleg Ivanov
Music production aficionado Dave Chrzanowski advises on selecting and positioning your speakers and managing the acoustics of your recording set-up
Saving up for months and buying a pair of expensive monitors doesn’t mean the music you produce will sound professional. A studio’s design and layout is fundamental in complimenting the sound any pair of monitors can reproduce. Firstly, placement of monitors in a studio set up is very important and based on scientific fact. Think triangles. Monitors need to be an equal distance apart and level with your ears, about three to five feet away, and turned inwards 60 degrees. So the monitors are at the base of the triangle and your ears are at the apex, allowing sound to travel directly to your ears. Elevating the monitors so they aren’t flat on the desk is recommended and can be done using stands. Also, place some monitor pads underneath to prevent interference from the surface they are sitting on.
Positioning of the desk is also important. Take a look around your studio space and consider the room’s dimensions. Many variables come into play, all have a basis in physics too. To avoid getting too technical, wall spacing and floor-to-ceiling height is one factor, having unnecessary furniture in the room is another. Small square rooms tend to kill bass frequencies, moving to a larger rectangle space is one solution. If possible, face your desk against the short wall, so the monitors send sound down the length of the room, this helps carry the bass frequencies and should give a flatter response which is the result you’re after.
Asymmetrical rooms will kill some of the reverb, but the average home is unlikely to have a room of this spec, so installing treatment can help. Panels can be stuck to walls, placed on stands or hung from ceilings at angles. Keep in mind that treatment isn’t the same as soundproofing.
When mixing, it’s important to understand how that mix will translate to other environments. If your studio isn’t set up right some frequencies will be more prominent than others. This will have a negative impact on the mix, forcing you to cut and boost frequencies that might not need attention. So, the mix might sound fine in that studio, but take it elsewhere and it could sound too thin or bass-heavy.
Use both headphones and monitors when mixing. In fact, buy two pairs of monitors. From experience, having a decent pair of studio monitors, a budget pair of hi-fi speakers and a set of headphones to hand while mixing is easier than running back and forth from the studio to the car to evaluate a mix.
Let’s face it, most people listen to music in their cars, on budget stereos and through headphones. So, mixing using all three will provide an understanding of frequency responses across different systems and how to adjust a mix to compensate.
Brands
Alesis is a popular brand amongst students, hobbyists and professionals alike. Price vs overall quality is always attractive, and Alesis are up there with the best. Ultimately, their Monitor One, M1 Active and Elevate 3 are well-built and impressive-sounding monitors and come at a low cost. But technology is advancing and the range of products changes year-to-year; Mackie’s XR624 and KRK Rokit’s 7 G4 being popular choices in 2019.
Know the lingo
Getting clued up on techy jargon is always advisable. Here are a few monitor-related terms to make life a little easier:
Active or passive: Active means powered, with speakers housing their own amplifiers, eliminating the need for external amps. There’s no right or wrong here, but if you already own an amp then passive speakers will offer a cost-saving alternative, as active monitors are usually more expensive.
Nearfield: Allows you to hear sound up close, coming directly from the monitor, minimising sound reflection off walls and ceilings. If working in bigger rooms, explore mid-field and far-field monitoring, but this is where treatment becomes much more important.
Frequency response: Studio monitors are designed with a flat frequency response, unlike stereos which have pre-set EQs. A range of 50 Hz to 20 kHz will provide a well-balanced sound. If mixing EDM or for surround sound 5.1, adding a subwoofer will increase the frequency response to 30Hz. It’s important to note that monitors may not be able to reproduce a full frequency range accurately.
+/- dB: Related to frequency, the +/- indicates the amount of variation that may occur across the range. For example: If a pair of monitors has a frequency response of 50Hz-20kHz +/- 2dB, it means there could be a discrepancy of +/- 2 decibels across the range. Any rating 3dB or lower is a good guide for a well-balanced sound.
Get to know your monitors inside out. Listen to all of your favourite songs using them, this will help you to perfect your mixes. Remember to cross-reference your mixes using headphones and budget speakers, car systems etc. This is how and where people consume music and mixes will sound different from one to the other.
As I’ve expressed previously, decide on a budget you can afford and stick to it. Trawl YouTube, read reviews and immerse yourself in comments sections. Get to grips with technical wording and focus on your needs. If recording vocals and guitar then a pair of nearfield monitors for under £100, like the Alesis Elevate 3, will do the job, so don’t invest in a 5.1 system with subwoofer – it’ll be a waste of money and valuable studio space.


Related Articles